We are not speaking of Widdershins. The math proved way out of my league so I shall wait to try this pattern when I have yarn of the appropriate gauge. I pushed on, though, and did try another toe up pattern with the lovely bamboo yarn. But it too kicked my butt with it's provisional cast on that wouldn't unravel nicely, instead releasing two or more rows of stitches every time I removed it. After an hour, I'd had enough and packed the bamboo yarn away. When I finish the Mister Joe socks I'll give the bamboo a try with my standard top down pattern. Speaking of Mister Joe... Sock one finished! And the wee beginnings of sock two. I haven't spent much time on these the last few days. Since winter has finally arrived here, I found myself in need of another pair of fingerless gloves. I love the Fetching mitts from a few months back, but find the cables on the palm a bit irritating after awhile. And since I've got tons of sock yarn around, I decided to find a pattern at that gauge. The Kat's Paws provided the perfect answer.
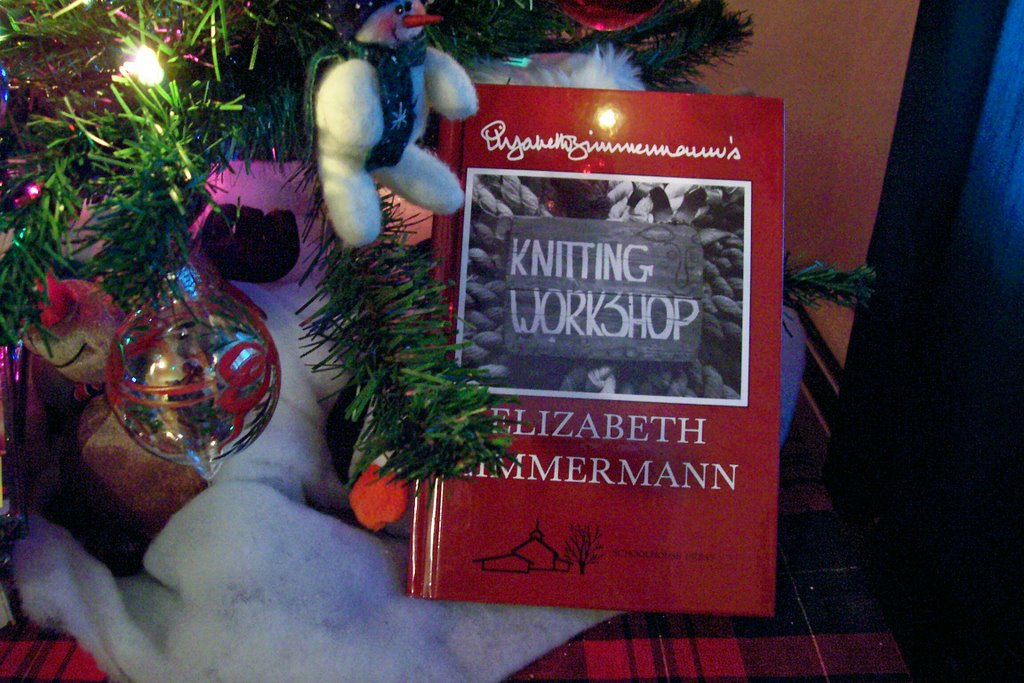
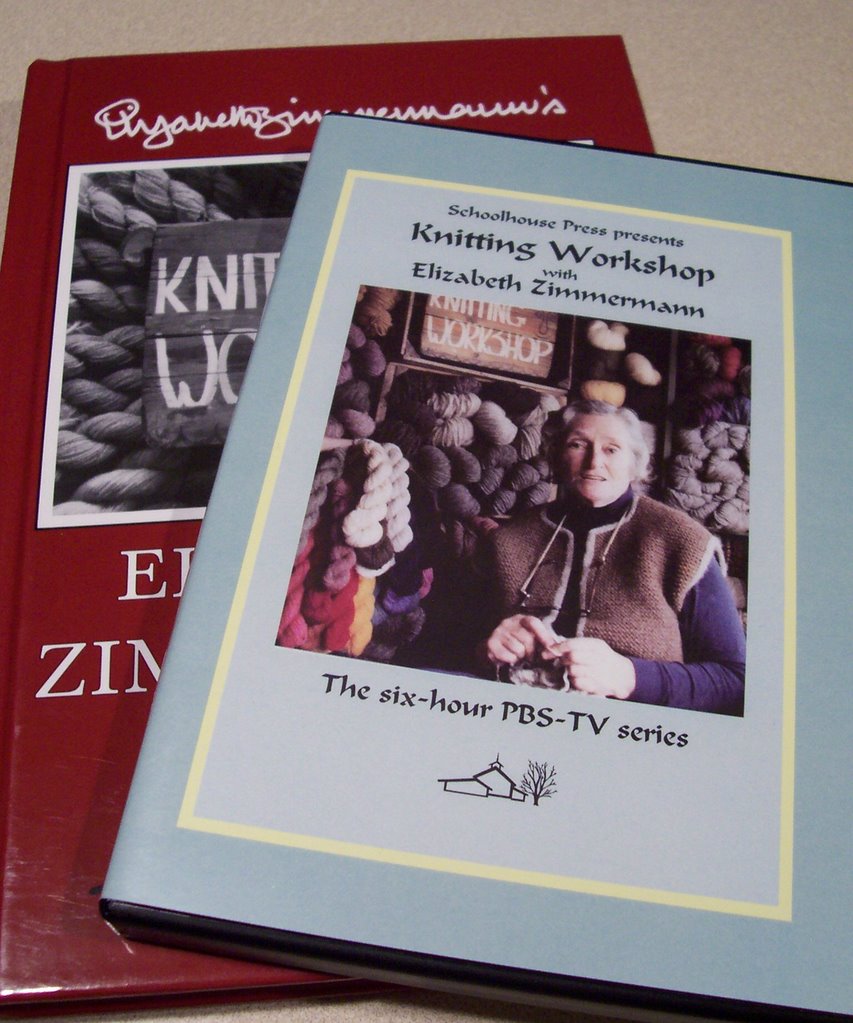
 The pattern designer claimed she could knit a mitt in 2 hours. It took me more like 6, but still a pretty fast knit in my book. They are long enough to tuck up into my sleeve and fall just below my fingers so they won't interfere with typing. The yarn is Gedifra Sportivo color 5704 and the needle a Suzanne's Ebony both from Webs. I'm not sure I'd like the yarn for socks. Maybe if it was knit at a tighter gauge, but at this gauge (7 st/in), I don't think it would hold up as a sock. The jury is still out on the needle. I love the needle it's self. It's a beautiful matte black and the stitches slide nicely on it. But the join is a bit bumpy and I find I have to wiggle the stitches over it most every time I switch needles. Of all the needles I've tried, I'm still going to go with Knit Picks as my favorite overall.Speaking of Knit Picks, they came through with flying colors once again. I ordered the companion dvd to EZ's Knitting Workshop book last weekend and it arrived on Friday.
 Sadly, I haven't had a chance to sit down and watch it yet. I spent much of my weekend watching the Doctor Who season one dvd set. Totally awesome!
This recent sock knitting kick I'm on, and the success I'm enjoying with the Mister Joe Blanket socks has prompted me to consider trying to knit with standard sock yarn again. I finished my Online Supersockes this afternoon and, although I should soldier on and finish the Mr Joe socks, I'm going to cast on Widdershins. I scored this Regia Bamboo on eBay after seeing it mentioned in a magazine ad. The ad said it creates a "temperature regulating, breathable fabric". I'm thinking it has the potential to be light enough for spring summer wear when it's too hot for wool socks. (Hell, it's been so warm here this winter, I've hardly worn my wool socks for winter!) The downside is, I don't like the fabric knit to the gauge called for in the pattern (7 sts/inch). I tried knitting a swatch on US 1 needles and got 9 sts/inch, which I really like. I moved up to a US 2 and got gauge, but the fabric seems too loose. So, I'm going to sit down with the pattern and work out the numbers at the smaller gauge. I just know I'm going to regret this. I'm not a big fan of knitting with such small needles and 9 gillion stitches. Plus, I'm going to have to knit this on double points (at least to start) because I don't have a US 1 cirular needle (yet, I just ordered one from KnitPicks). But this yarn is FAB, and I'm willing to give it a shot at the prospect of something awesome in the end. I'll let you know how I make out.
Speaking of how I made out...The plastic bag liner worked very well for the soap yesterday. As you can see, there's some fold lines in the sides, but nothing a little trimming didn't solve. This soap was scented with an oakmoss blend and has a lovely fresh scent. I used a little clove and paprika to color it, but not enough. I wanted a more light brown color. I even added some brown coloring to the soap when I saw it wasn't coming out dark enough, but still it's a little light.
Well, as I feared, the vanilla scented soap from earlier this week is morphing...
 What started as a lovely creamy white is slowly oxidizing to brown. It's just at the edges so far, but this will spread throughout the soap. I'm hoping the browning is light enough that the blue swirls still show. This happened to me once before with a lavender vanilla scented soap. It started white with light purple swirls and ended up almost completely brown. Much as I love vanilla scents, I think I'll give up on them until I get some non-discoloring scent. The soap is perfectly usable, just not very pretty to look at.
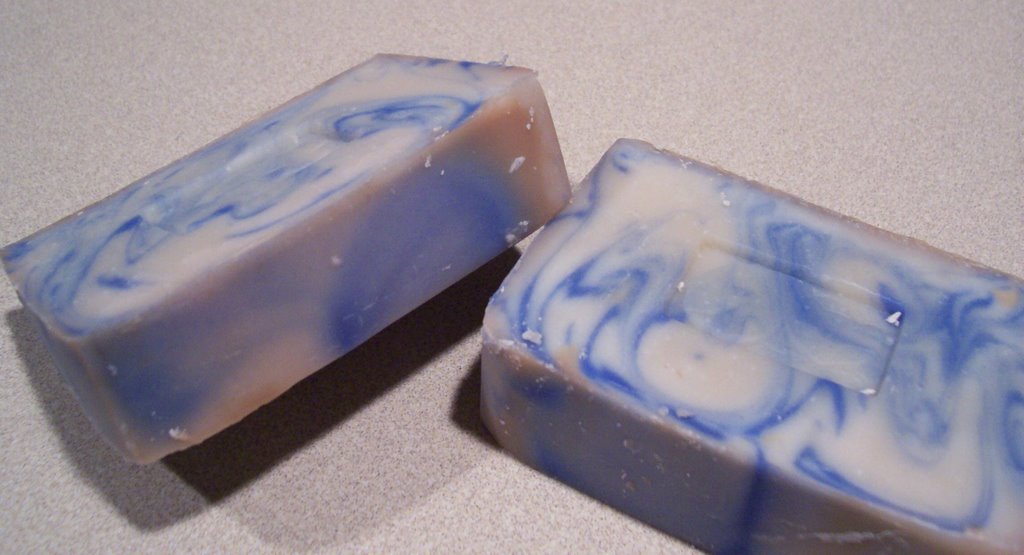
I made a batch of plain castile soap on Thursday. It is mostly olive oil with just a small percent of castor oil to improve the lather.  This is shortly after I cut it. I had to wait almost 2 days for it to be firm enough to cut. Even now, the center is still a bit soft. It almost looks like marble inside. This will change as it ages and become solid cream color. There has been a lot of talk about 100% olive oil soap on the soap list and I've been wanting to try it for awhile. So far, I'm very pleased with the results. It's my understanding this soap will take longer than other soaps to cure, so it will be a few weeks before I can give it a try.
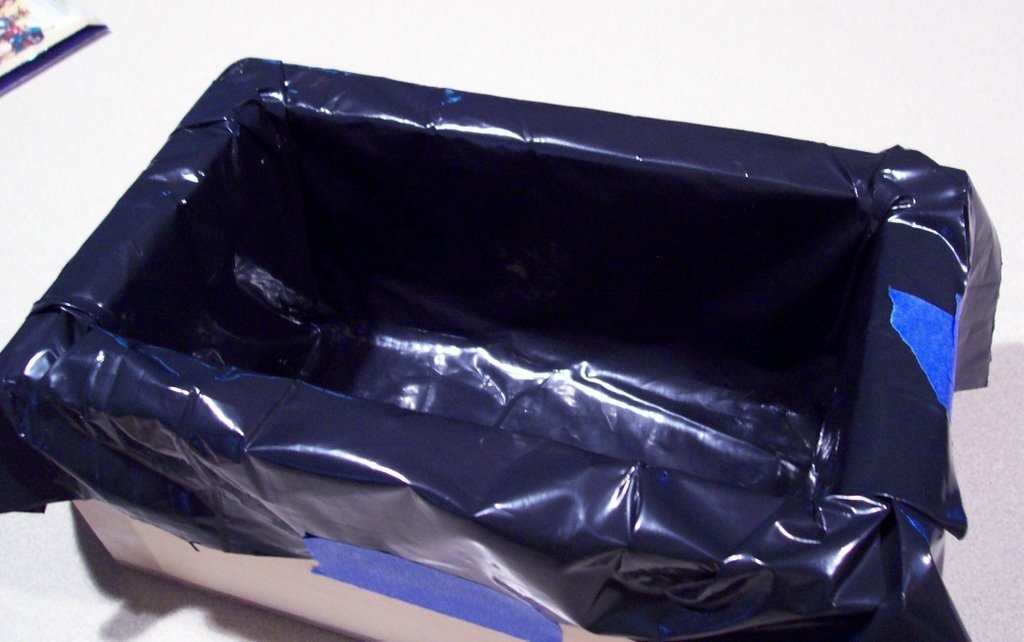
I made one more batch of soap today. This time I'm trying lining the mold with heavy plastic as suggested in Soap.  It's definitely more fiddly than freezer paper, but I'm almost out of freezer paper and wanted to give this method a try before I bought more. The soap is resting now, should know tomorrow how the liner worked.
I'm a child of the 80's, through and through. The other day, one of the girls at work and I were talking about Ferris Bueller's Day Off. I reminisced that I had seen it in the movie theater with my sister and a friend from school. And that I remembered getting posters and buttons because it was some special showing. Well, lo and behold, I went looking and found my stash of buttons...
 I was a HUGE Duran Duran fan, so the majority of my buttons are theirs, but there it is, my "Leisure Rules" FB button. I'm such a geek that it makes me so happy to have found it. Probably even more so that I'm blogging it!!
I'm currently reading Wendy Johnson's Wendy Knits. She mentions that when she decided to blog, she made a commitment to post daily. And she does. She always finds something interesting in her day to post about. Now, I have no such goals or commitments, nor do I delude myself in thinking I have something anyone wants to hear about every day. But I would like to blog more often. So I've decided to take a small influence from Wendy and post my cats. Stuart (grey cat) and Quinn (black cat) are an endless source of joy for us. And, generally, provide some form of entertainment (or frustration) everyday. So today I present as evidence of the frustration quotient...
 Cat on clean laundry. At least it's towels and not clothes!
I realized I haven't mentioned my soap in quite a while. I'm not really sure why. I'm still soaping. Quite a lot actually. As my family will attest to since I'm constantly gifting/pushing soap on them! Soaping goes much quicker than knitting. Far less photo-ops. But recently, I decided to slow down and get pictures of the process, at least this is how I do it.I keep all my supplies boxes for easy transport from the storage area (basement) to the work area (kitchen). I start with making the lye/water solution and setting it aside to cool.
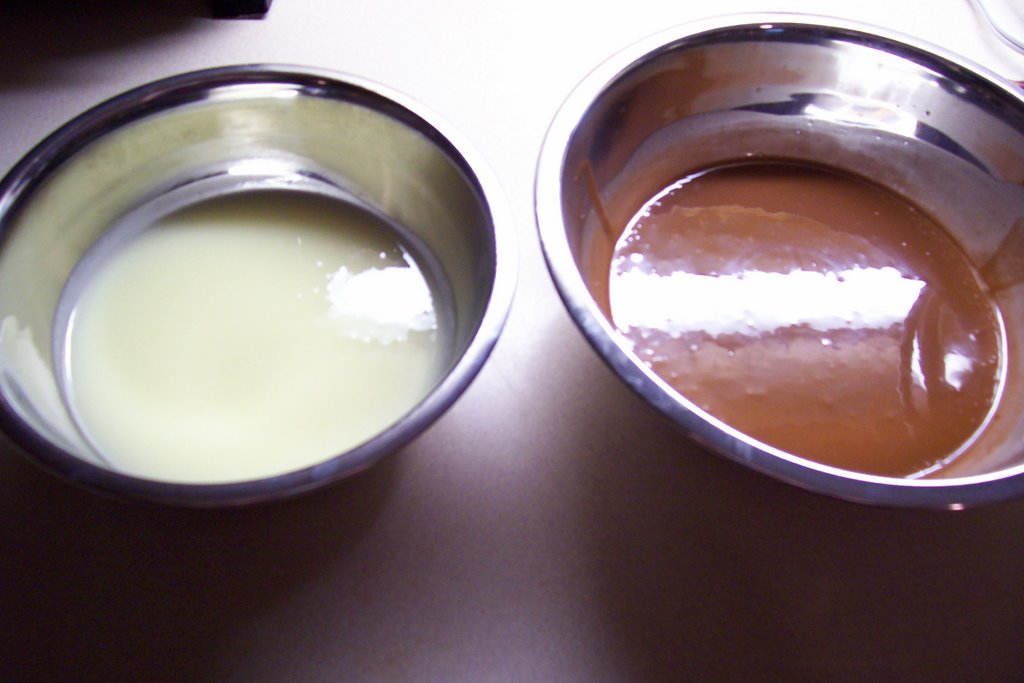
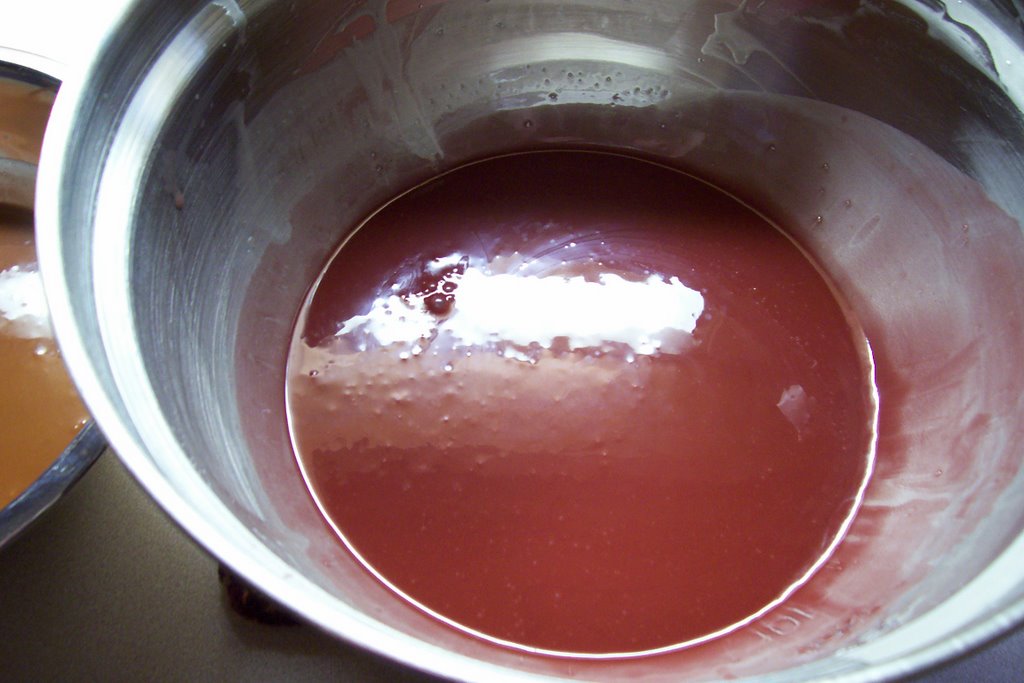
 Next I weigh and melt my oils.
 While the lye cools and the oils heat, I prepare my mold. The mold needs to be lined with freezer paper to keep the soap from sticking to the mold. It also ensures the sides of the soap will be nice and smooth.
  This is a 2 pound mold I purchased from Saratoga Scents. I have a silicone bread loaf pan that I sometimes use, it does not require lining, but I'm not as happy with the shape of the finished bars. The wooden mold provides nice, square sides. Very little trimming is needed with this mold.
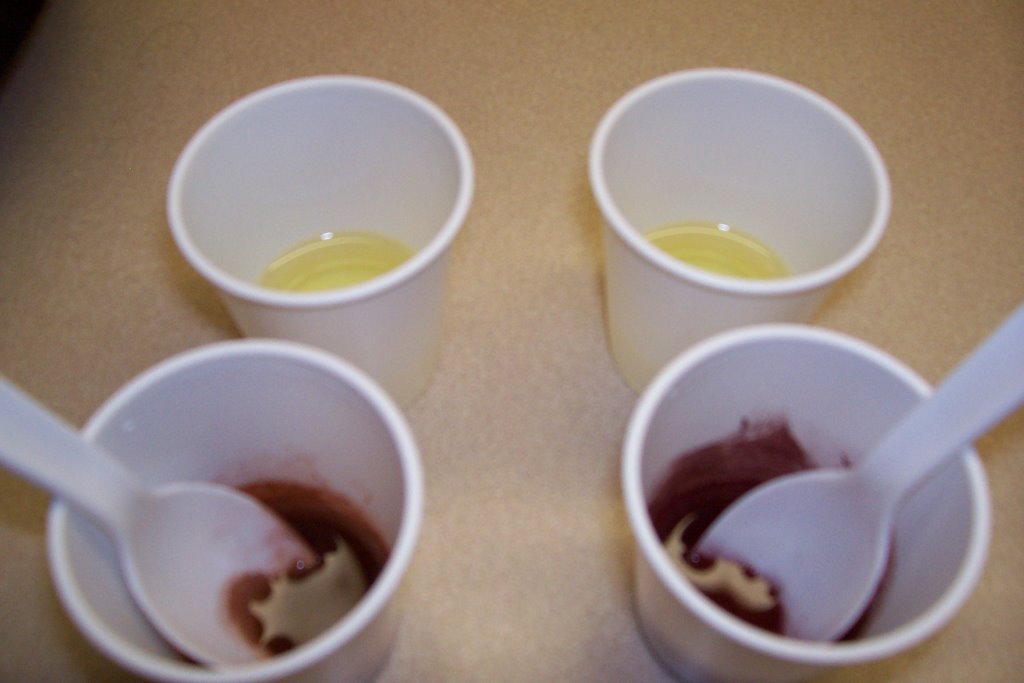
If I'm scenting and/or coloring the soap, I measure the fragrance oil(s) into their own cups and I combine the color powder with a little water to dissolve. I like to use disposable plastic bathroom cups for this since these ingredients are messy to clean up. Once the lye/water and oils are about the same temperature, you combine them and stir until the soap thickens.
  I like to use a stick blender for this step. I've never tried making soap the "old fashioned way" by hand stirring it to trace. I hear that can take a long time, hours even! With the stick blender, I reach trace in less than 10 minutes.
When trace is reached, I add the scents and colors. This batch was a fairly ambitious 3 color swirl. I pulled approximately 1/3 to be left plain, 1/3 was colored with cocoa powder and scented with chocolate fo. The final third was colored burgundy and scented with cherry almond fo.
 Then the 3 colors were poured into the lined mold. The color looks exceptionally bad at this point.
  The soap then sits in the mold for about a day before unmolding. (Missed pictures of this step). I cut my soaps into 1 inch bars and let them air dry for a few days before stamping with my Milky Way cat stamp. The final result...
 Chocolate Covered Cherries soap. The log of soap probably should have sat another day before cutting, you can see the marks at the bottom where the soap stuck to the blade. And the swirl is practically non-existent. I've come to the conclusion it would be better to keep the majority of the soap one color and have much smaller amounts of the swirl colors. Regardless of it's cosmetic flaws, it's a fabulous soap (if I do say so myself).
Here are some more pictures of recent soap creations. This picture shows my drying area, a piece of needlepoint plastic on newspaper on a shelf in the basement. Works very well and can hold 3 batches of soap (I only make 1 or 2 pound batches).  Finished soaps. Clockwise from the top: Cocoa Rose (my husband's aunt's favorite. I make this pretty much just for her since I'm not a huge rose fan); Green Tea (this is a new one for me, made with green tea in place of water and scented with green tea fo. The scent is very herbal); Pumpkin Spice (made with real pumpkin, see recipe here, and spices. This was done in the silicone pan, see how the shape is different); and a soap I made just for the holidays this year called Merry Christmas (it smells fantastic, but I hate the color of the lather. I'm picky about stuff like that.)
 And finally, my all time favorite soap, Lavender. This batch is as close to perfect as I've come. I used lavender essential oil, the real stuff, not fragrance oil, and it smells DIVINE. The swirl is nice and the bars have the right "feel", hard but not brittle, nice opacity. I have given some of these away, but I'm hoarding the rest. I love them so much.
 If you want to learn to make soap yourself, I encourage you to pickup a good book and check out the abundant resources on the Internet. Some of my favorite books are, in order of preference: 1 Everything Soapmaking (a 2nd edition of this is being published this spring if you can't find the original); 2 Soap by Ann Bramson; and 3 the Soapmaker's Companion. There are tons of great websites to explore. Some of my favorites are, in no order: Soap @ About.com; Soap Calc; Miller Soap; and these Yahoo Groups... SoapMaking 101 and SoapMakers.
I hope you enjoyed this look at soapmaking. I feel better having given my second favorite hobby some much deserved attention. Soaping is a fun and satisfying process. It feels to me like modern alchemy, taking unrelated substances and producing something completely different, even if it's not gold.
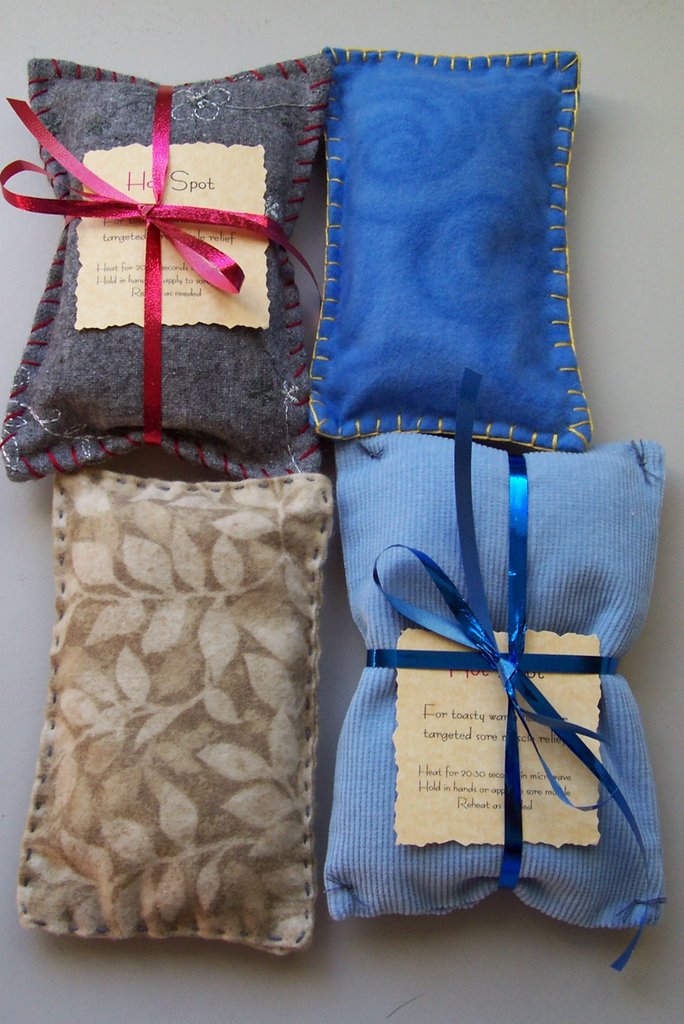
The Martha Stewart Holiday magazine was FILLED with fantastic ideas this year. I've got many of the projects flagged to do "someday". But one particular item really struck my fancy...hand warmers (pg 65). My hands are always cold and I thought these looked perfect to tuck into a pocket. I made one, mostly following the directions in the mag only I used rice instead of pie weights to fill the warmer and I machine stitched around the edge (I hate hand sewing!) The result was less than I had hoped... You can see my attempt there on the left. Part of the problem was the fabric. I used wool felt, which ended up being too stiff. I also used too much rice further adding to the stiffness of the piece. And the over all dimensions were too small. So I went back to the drawing board and came up with an improved version of the hand warmers. I call them Hot Spots. Mine are a bit larger and have an inner bag containing rice and salt which is sewed up with the tiniest stitches possible to prevent leaking. Then I sewed a larger bag to encase the rice bag and blind sewed it shut. Finally, I hand stitched around the edges for decoration (this step could be skipped, but it does look nicer if you take the time to do it). The result is a soft, flexible little pillow that can be warmed in the microwave and stuffed in your pocket to keep your hands warm. It's also great for spot heating an sore muscle. I added a drop of fragrance oil to the rice bags of a few of them, these are particularly delightful.
 Today was Christmas Bread day. Can't wait till Monday to have some!
 Check out my cool flea market score last week...Clara, Herr Drosselmeyer & the mouse king nutcrackers!!
 We got to the flea market about an hour before closing time and really didn't expect to find anything. I saw these three nutcrackers laying in a box. When I asked the stand owner how much he wanted he said "$8 each or I'll give you all 3 for $9". I thought he was pulling my leg, so I asked his wife if he was joking and she just laughed and said no he's just like that. Needless to say, I took them. I'm sure they aren't worth much, but I think they are so adorable. The mouse king needs a sword, but I should be able to find something that will work. Clara appears to be missing something to go on top of her head. I've looked online, but can't find this particular version of Clara anywhere. There's a hole in her head where a peg for a hat might go. But I'm thinking of just getting some blond doll hair rather than trying to make a hat.
I must be off to finish wrapping and baking. Merry Christmas everyone!
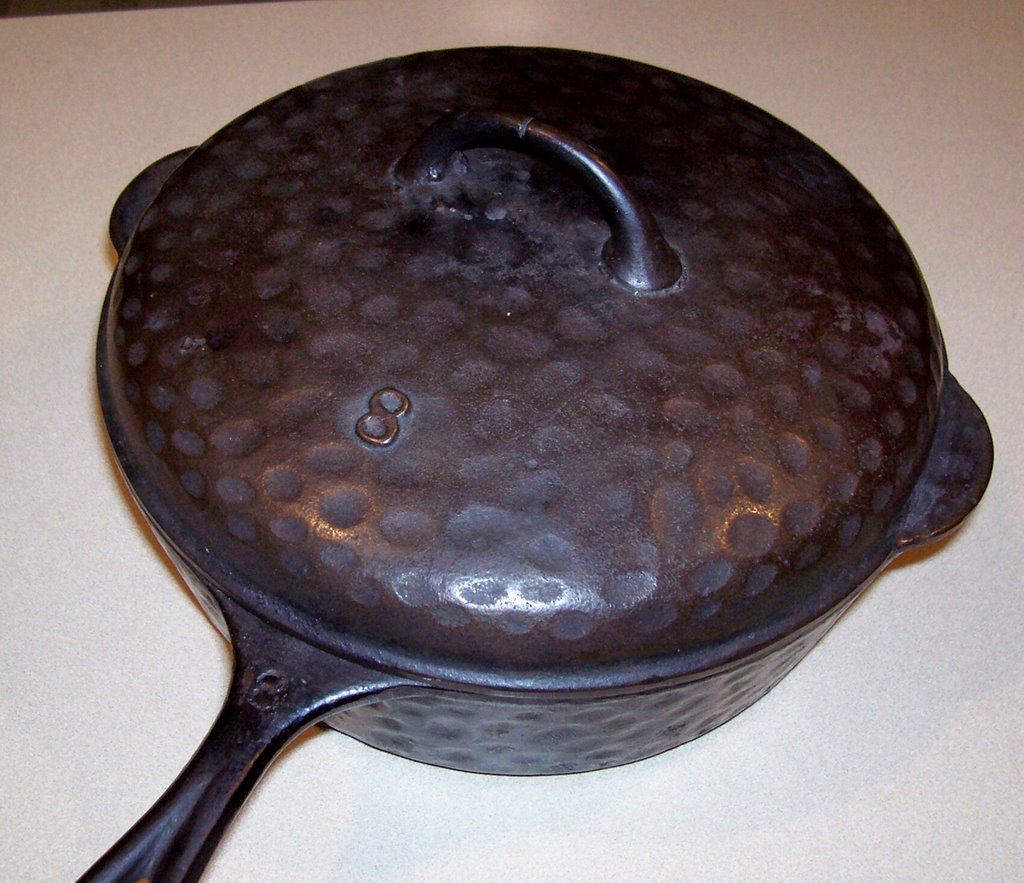
I love to bake. Especially this time of year. My husband's friend sent me a bread recipe that sounded really interesting. You basically just mix together the four ingredients (flour, yeast, salt & water), give it a good stir, let it sit for hours, knead it 2 or 3 times, let it sit some more, then turn it into a pre-heated pot, cover it and bake. It sounds way too easy, but that makes it all the more intriguing. Trouble is, I have only one large covered oven safe pot and it's in use making ham & beans for supper. Enter this fantastic piece of family history... This is one of my late Grandma Miller's cast iron pans. My dad told me, his dad made (that's right I said MADE with his own hands) a whole set of cast iron pans for her. This was back in the '30s when he worked for steel mill (I'm not sure if this was when he was at Bethlehem Steel or perhaps another mill). This pan is awesome. It's some 70 years old and not a speck of rust or wear on it. It is perfectly seasoned and smooth as a baby's butt. My grandma used this pan to make her corn pie, unquestionably the best corn pie one could ever hope to taste. I wish I had her recipe, although I've been able to come pretty close with an amish recipe I found. I think while the pan is visiting her at my house I may have to whip up a corn pie in her honor.
As promised, a picture of the finished hats for the in-laws. Hats are kind of hard to photograph without a head in them, so they look a little wobbly.
 These are the rolled brim model from the Holiday 06 Knit Simple magazine. As I said in the last post, I put in a couple of inches more in both the brim and body section above the checkerboard on the second hat (which is actually the hat on the left in the picture). It feels like it will fit an adult size head much better.
A little peek at my current knitting.
 Can't say much about this one as it may or may not end up a Christmas present for someone, depending on how much knitting time I get in the next 2 weeks.
A small bit of stash enhancement this week, courtesy my good friends at Elann.
 This yarn, Mister Joe Blanket, was featured in this week's newsletter. It's a wool/nylon blend and it's super soft to the touch. It's a bit finer than I like (sport weight) but I'm thinking I may use it for socks. It's funny how frigid temperatures and cold feet make you long to knit nothing but warm socks.
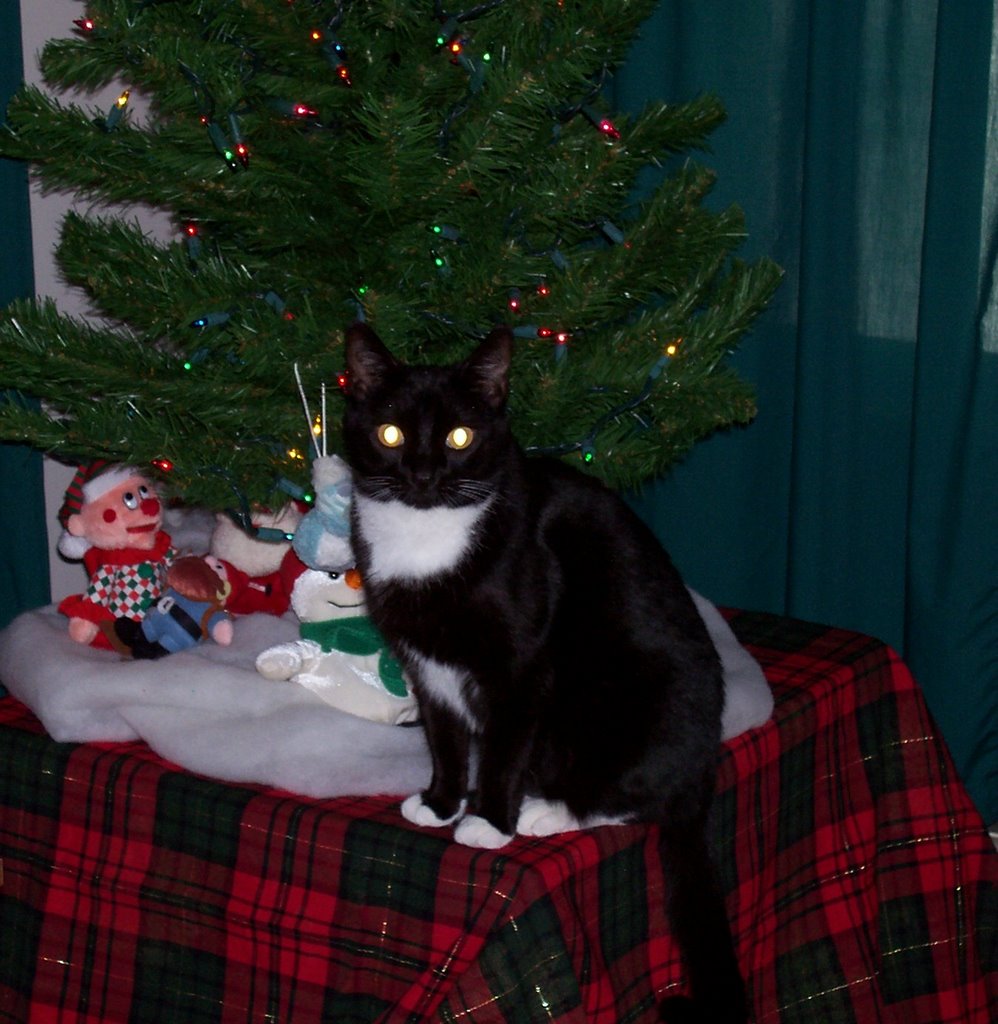
I decided it's about time we got the tree up for Christmas and set to work at doing just that this morning. I got the tree on it's stand and put the skirt on, we'll do the decorating tonight. I walked out to my laundry room to flip the wash, came back to the living room 3 minutes later and found this... Anyone care to place a bet how soon the tree will be on the floor?
 Sock one finished! And the wee beginnings of sock two. I haven't spent much time on these the last few days. Since winter has finally arrived here, I found myself in need of another pair of fingerless gloves. I love the Fetching mitts from a few months back, but find the cables on the palm a bit irritating after awhile. And since I've got tons of sock yarn around, I decided to find a pattern at that gauge. The Kat's Paws provided the perfect answer.
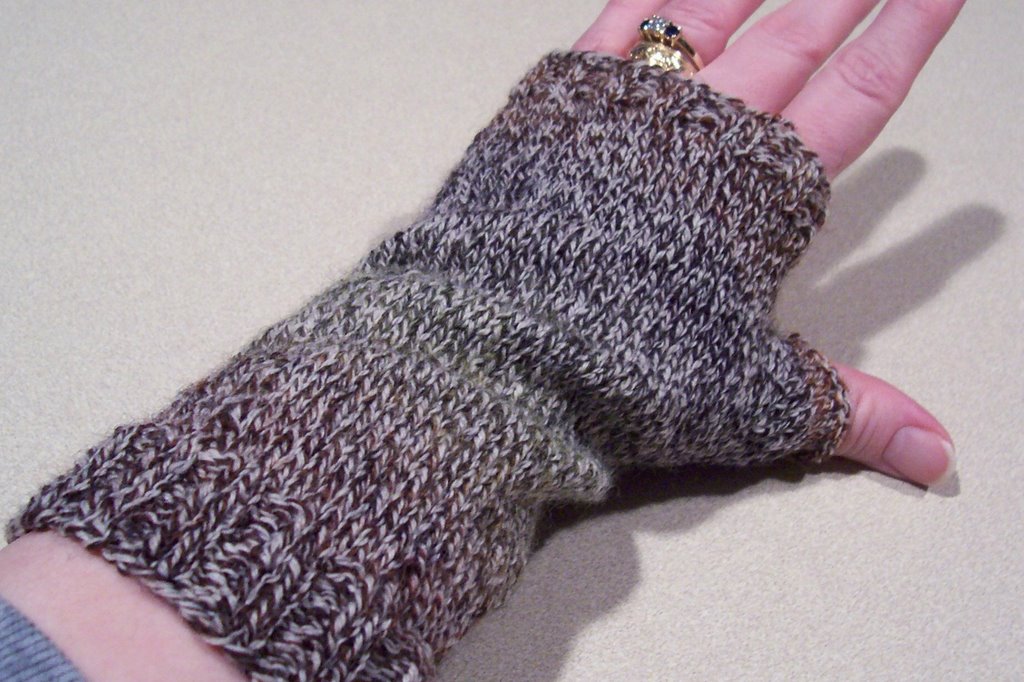 The pattern designer claimed she could knit a mitt in 2 hours. It took me more like 6, but still a pretty fast knit in my book. They are long enough to tuck up into my sleeve and fall just below my fingers so they won't interfere with typing. The yarn is Gedifra Sportivo color 5704 and the needle a Suzanne's Ebony both from Webs. I'm not sure I'd like the yarn for socks. Maybe if it was knit at a tighter gauge, but at this gauge (7 st/in), I don't think it would hold up as a sock. The jury is still out on the needle. I love the needle it's self. It's a beautiful matte black and the stitches slide nicely on it. But the join is a bit bumpy and I find I have to wiggle the stitches over it most every time I switch needles. Of all the needles I've tried, I'm still going to go with Knit Picks as my favorite overall.
 Sadly, I haven't had a chance to sit down and watch it yet. I spent much of my weekend watching the Doctor Who season one dvd set. Totally awesome!